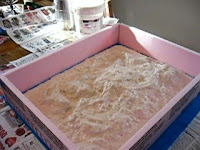
So there you have a mold with the original still inside under it. As much as it would be great to stop here and call it a day, you can't really cast anything into here as is because the moulage isn't a stiff mold material. It's like rubber right now... if you peel it off and flip it over it may split and crack but more importantly it will invert and bend itself so you can't retain the shape of the mold. What you need to do is make a mother mold for it. The mother mold is a more rigid material, like plaster that you simply pour over the mold so it has something behind it to hold it and keep it in shape and not bend. So you need to do a few things before you make that:


Here are the supplies you'll need if you want to be extra safe: hotglue/gun, tape, utility knife, tape measure and pink insulation foam (the kind at home improvement shops people put in walls to insulate houses).
What we're going to do with these is make a box frame around the island with the foam. Measure out how large you need including an extra ince or so to be safe and make it a little higher than the island+mold. I hotglued those perimeter pieces to the plexiglass under the mold and in each corner up the sides. The hotglue will make a nice removable seal all over so you can now pour a plaster mother mold on top of the moulage mold. Here's where I went dumb and didn't photograph the process, but it's simple enough to explain. You can use any plaster you want really so I went with cheap drywall mud. I chose to use the 20 minute sheetrock mix just to make sure it wouldn't take forever. Mix up a fairly runny batch with water and pour it over the mold and run your hands all over it to settle it into place properly. You can do this as many times as you want to ensure you have a strong mother mold.


Once the mother mold has set-up you need to fill in all the remaining empty space of this box frame with something to support itself. I stuff a bunch of plastic bags and foam on top of the mother mold until it was compacted nicely and level with the top of the frame. Then I taped it all up and added cardboard to give it a good uniform surface. All of that plastic in there is to make sure the mother mold is also supported because it can also crack under pressure if you don't do this. One way to help strengthen the mother mold is to layer fiberglass joint tape into your layers or plaster.

Time to flip! If everything has gone according to plan, your molds are secure and ready to be used. Carefully holding both top and bottom of the structure flip it over so that the game is now upside down. Because I used plexiglass I can simply lift it off evenly from the hotglued foam frame. Under that you will see the original game and you can now carefully lift from one side making sure it's not sticking to the moulage mold. If it all works properly, you should have a beautiful moulage mold ready to be cast in!
More images and hopefully video to follow soon. I need to do some serious editing and maybe reshooting with photos instead. Next I'll try to document making the mold and expressing my frustrations with that process.


No comments:
Post a Comment